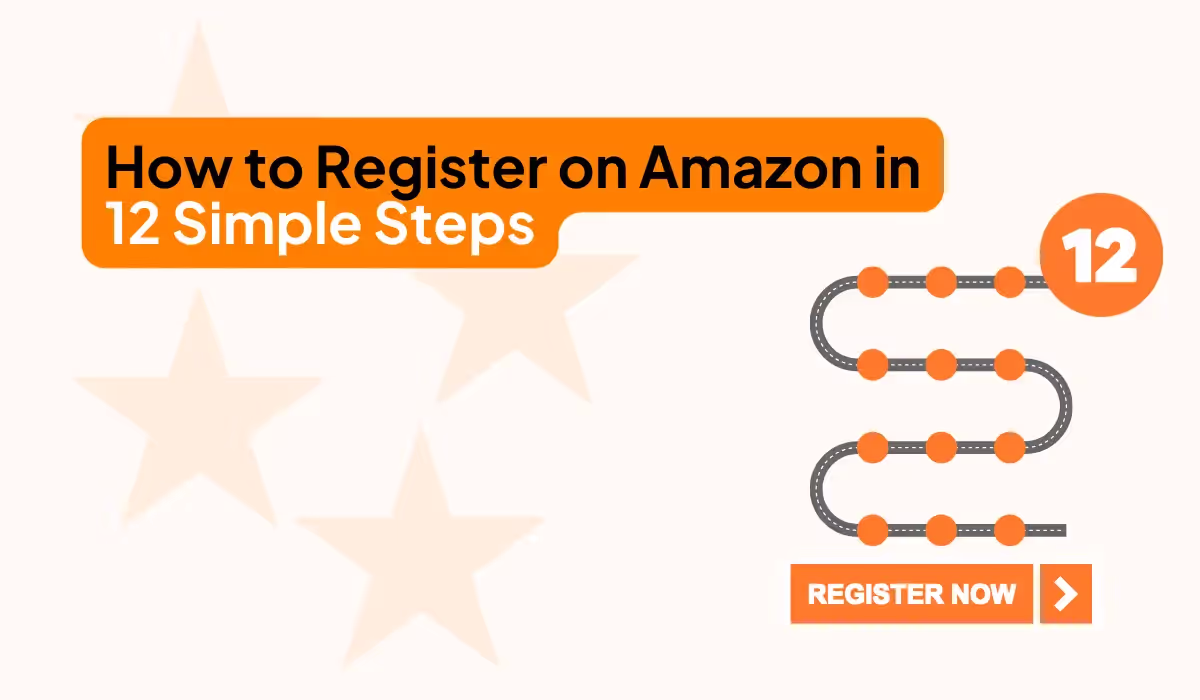
How to Register on Amazon in 12 Simple Steps


Registering on Amazon is one of the most frustrating experiences an e-commerce business can go through. Sometimes it’s straightforward, but often it involves a lot of back-and-forth with documents, leading to delays and headaches. At SellWave, we’ve helped numerous sellers navigate this process in both Europe and the Americas. It hasn’t always been easy, but we’ve managed to get 100% of our registrations approved, and we plan to keep that track record. We can also assist you with your Amazon registration. But for now, I’ll walk you through all the steps so you have the information you need to complete the process on your own.
If you need help with registration, as well as with information on how to register shipments, upload new products, choose a logistics solution, etc. Check out our services or contact us now.
Step 1 - Choose a Region for Registration
Amazon's marketplaces are divided into different regions, and you need to register for the regions where you want to sell. Each region includes several countries, and registering in one country within a region allows you to sell in all the countries of that region. The regions and countries are:
Europe: Sweden, Germany, Italy, Netherlands, UK, France, Spain
Americas: USA, Canada, Mexico, Brazil
Asia-Pacific: Japan, Australia, India, Singapore
Middle East: Turkey, United Arab Emirates
Step 2 - Start the Registration on Amazon
To begin the registration process, go to the following page(s):
Europe: sell.amazon.se
Americas: sell.amazon.com
Asia-Pacific: services.amazon.com.au
Other Regions: Find more information here - sell.amazon.com/global-selling
Once you’re on the appropriate page, you can start the registration process. The process may vary slightly depending on where you’re registering, but overall, the steps are quite similar across regions. Below, I’ll use Amazon.se as an example and cover everything you need to know.
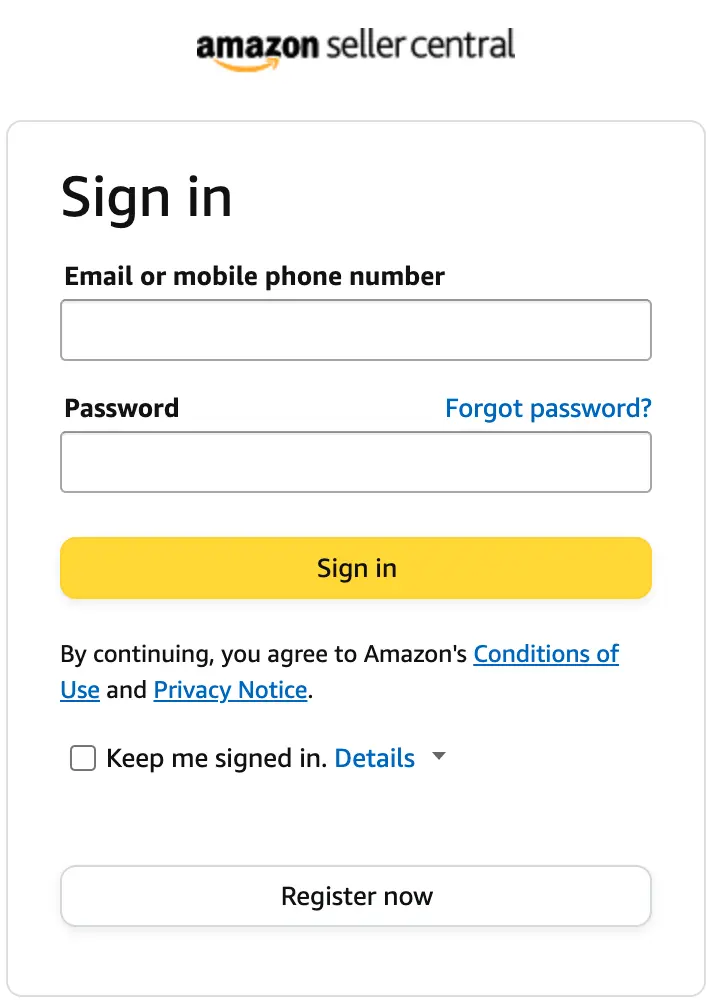
Step 3 - Create Login Credentials
The first step is to create a user account. This is simple and quick. Enter your email address and password, then move on to the next step.
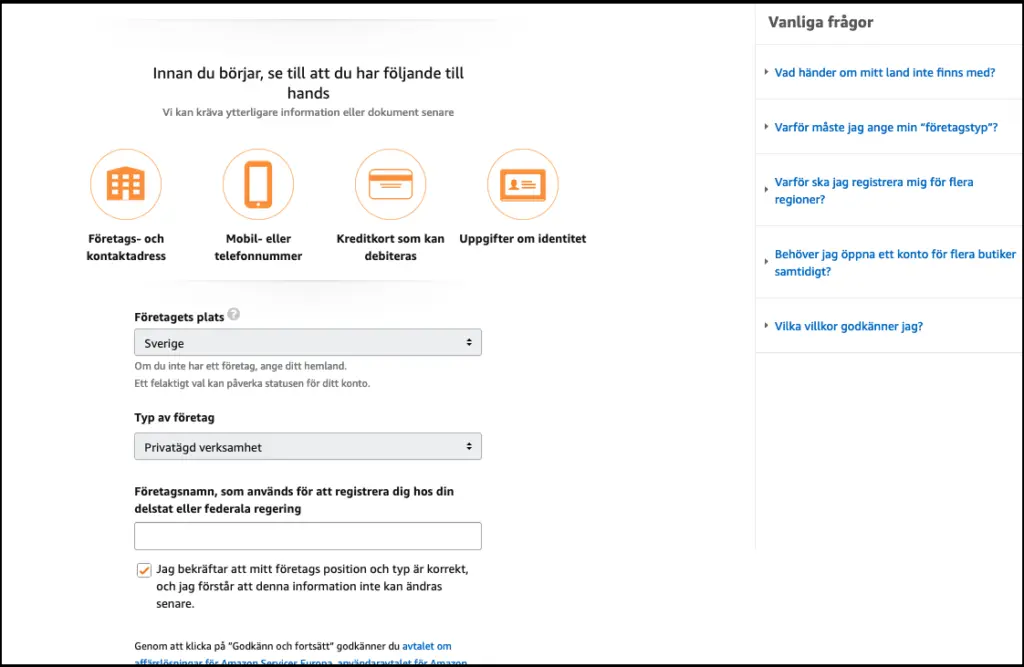
Step 4 - Enter Company Name and Country
The first step of the actual registration process is to fill in the initial company information.
- Company Location: This will likely be Sweden for you.
- Type of Business: Private-owned business or something similar is probably what applies to your company. But double-check what fits your organization.
- Company Name: Enter your company name, for example, "SellWave AB."
Important! Double-check the spelling before moving on to the next step!
Step 5 - Register Company Information on Amazon
Next, you need to enter more detailed information about your company.
- Company Registration Number: Your company’s registration number.
- Registered Business Address: The company’s registered address. It’s important that this is the registered address, as you will need to provide proof of this address later.
- Phone Number: Just a standard phone number, preferably for the person who will be responsible for Amazon in your organization.
- Primary Contact Person: This contact person will later need to verify their identity with an ID card or passport.

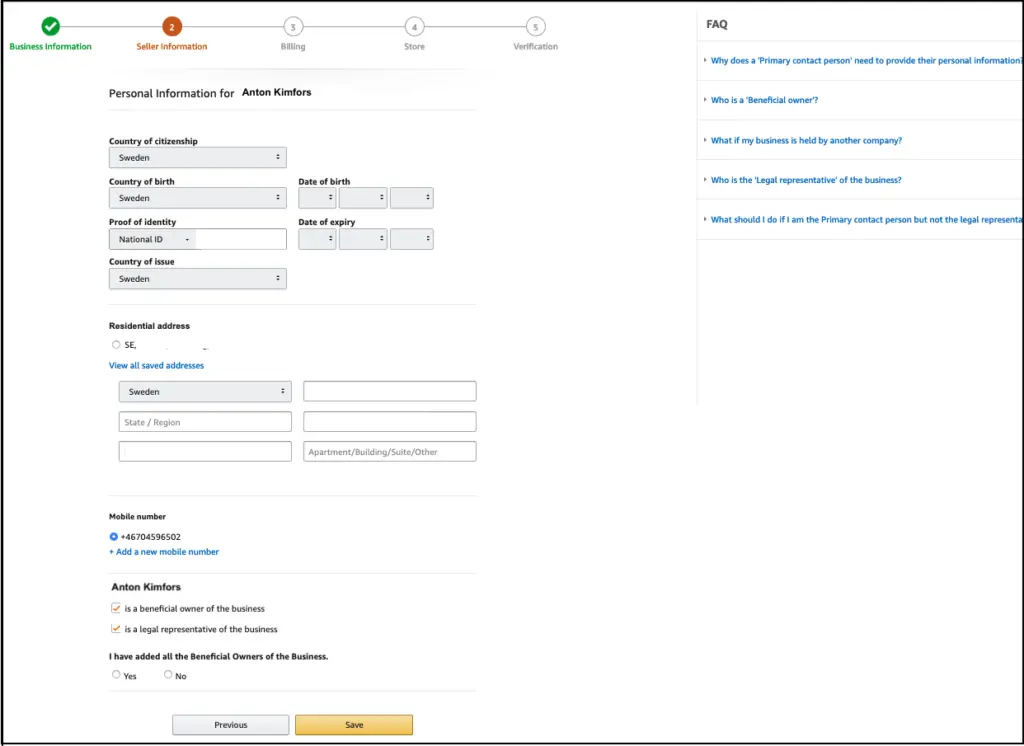
Step 6 - Enter Contact Person Information on Amazon
Next, enter additional details about the contact person you listed in the previous step.
- Country of Citizenship: The country of citizenship.
- Country of Birth: The country of birth.
- Date of Birth: The contact person’s date of birth.
- National ID: A passport or national ID card (e.g., driver’s license).
- Date of Issue: The date the ID was issued.
- Country of Issue: The country where the ID was issued.
- Residential Address: The contact person’s address (may need to be verified later).
- Mobile Number: The contact person’s phone number. This can be the same as the previous step.
At the bottom of the same page, you’ll also need to confirm the following details for the contact person:
- Is the contact person a beneficial owner of the business? This refers to someone who owns 25% or more of the business or has significant control over the business.
- Is the contact person a legal representative of the business? Is this person a representative of the company? For example, can they sign contracts on behalf of the company or open payment accounts?
- I have added all the beneficial owners of the business: This confirms that all beneficial owners have been listed.
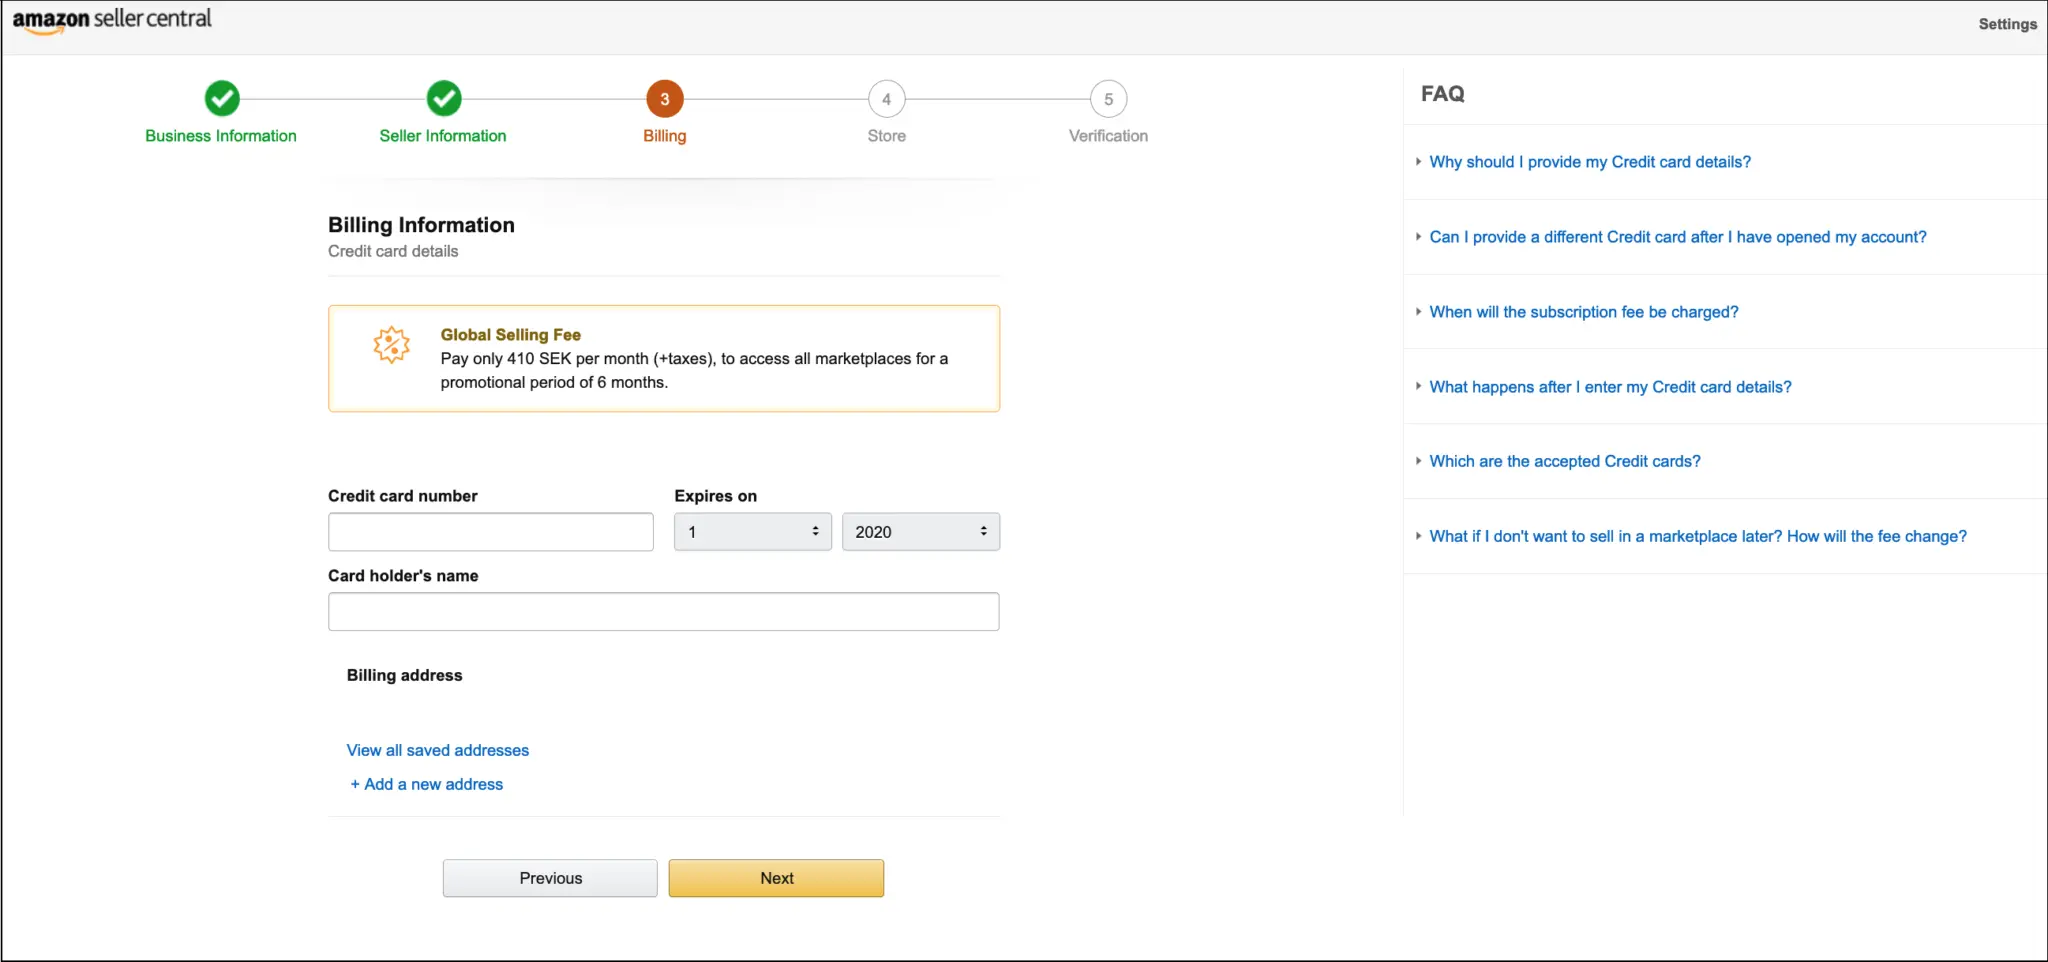
Step 7 - Enter Payment Information for Amazon
This step is very straightforward. Amazon simply asks you to enter a credit card to cover any costs that may arise when selling on the platform.
- Credit Card Details: Standard card details. While Amazon asks for a credit card, it’s usually fine to enter a debit card.
- Billing Address: The company’s billing address.
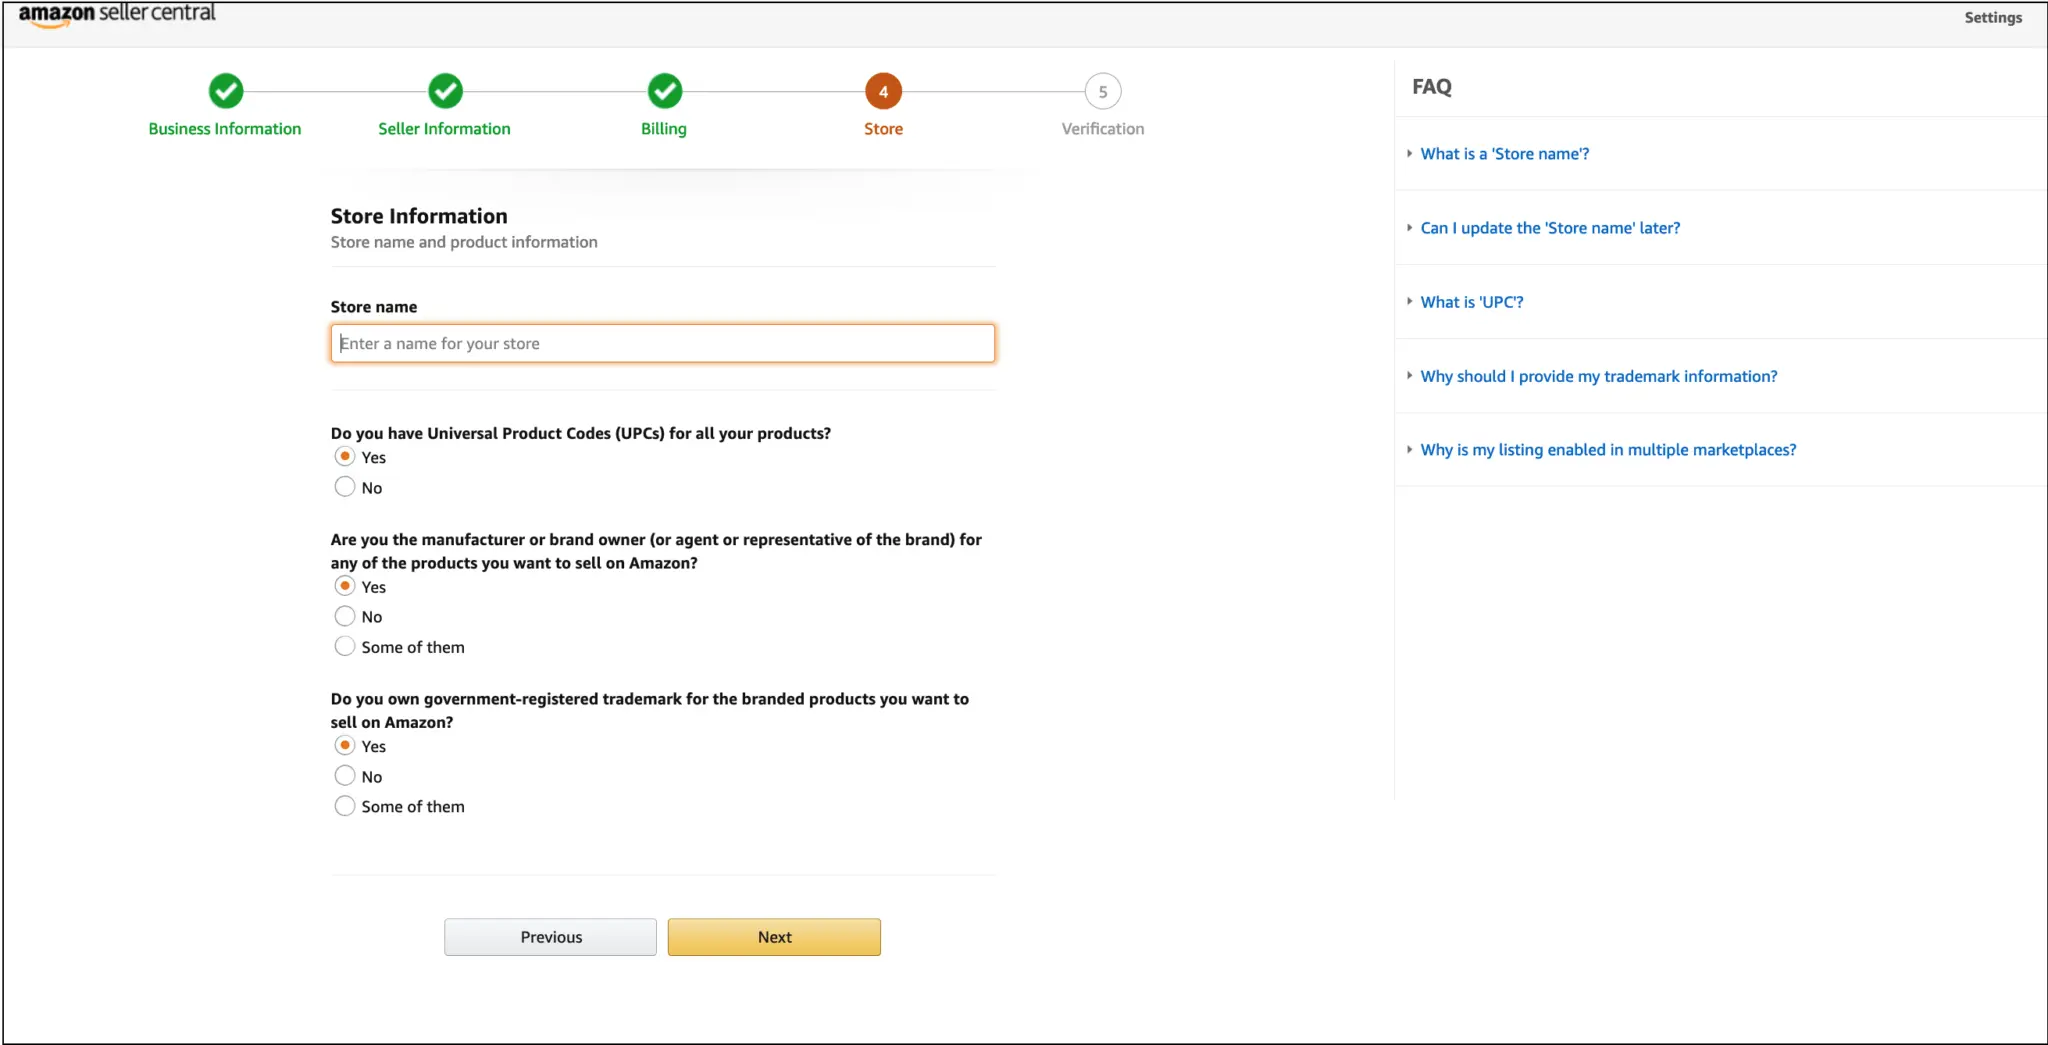
Step 8 - Enter Brand and Product Information
In this step, Amazon asks for some details that will be important for your profile on the platform. This should be quick and easy to fill in.
- Store Name: The name that will be visible to customers when you sell products on Amazon, for example, "Sold by SellWave." This name doesn’t have to match your company name.
- Do you have Universal Product Codes (UPCs)? Amazon is asking if you have the codes that will be used to register your products. These could be EAN, GTIN, or UPC codes.
- Are you the manufacturer or brand owner (or representative) for any of the products you want to sell on Amazon? Simply put, do you and your company own the products, or are you just a reseller?
- Do you own a government-registered trademark for any product? Do you have a registered trademark? This could be your company name, logo (with text), or specific products.
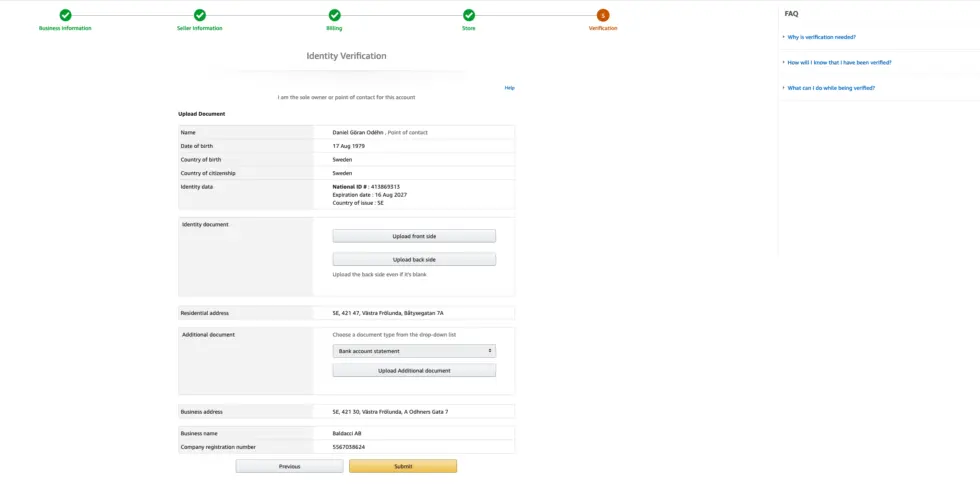
Step 9 - Verify Your Information on Seller Central
Verification is partly for you to review the details summarized from the previous steps but also to upload two documents. Therefore, it’s important to check all the details to ensure they match. All the information must also match the details on the two documents you need to submit:
- Identity Document: This could be a national ID card, driver’s license, or passport to verify the contact person’s identity. You can either scan or take a photo of your ID. All text must be clearly readable—no blurry photos with reflections that obscure parts of the text.
- Additional Document (bank statement): A document issued by your bank to verify your company’s existence and bank account. Many Swedes trying to go through this step use a bank statement from a Swedish bank. This can work for registration, but it often causes unnecessary problems. The bank account you link to Amazon for payouts needs to be in a country where the local currency is supported by Amazon. Currently, SEK (Swedish krona) is not one of them. We hope this changes soon now that Amazon has launched in Sweden. Since you’ll need a foreign bank account anyway, we recommend signing up for Hyperwallet at this stage and obtaining a bank statement from them. Hyperwallet provides bank statements that meet all of Amazon’s requirements.
If you don't have a foreign bank account?
To fulfill Amazon's bank account requirements, you need to open a bank account in a country with, for example, USD, EUR or GBP as the local currency. If you don't already have such a bank account, I highly recommend using Hyperwallet - a digital bank recommended by Amazon themselves. There are also other options like Payoneer and Transferwise, but Hyperwallet is clearly the easiest. You can always switch afterwards. With Hyperwallet you saw a bank statement as soon as you registered, smooth right? If you want to use Hypewallet, we have a guide for this here - Set up an account with Hyperwallet. Go through that guide and then come back here.
Step 10 - Wait for Amazon’s Decision
Once you’ve completed all the steps and submitted your application, all you can do is wait. It’s not uncommon for people to be rejected during the registration process. If this happens to you, don’t panic. Review all the information you submitted to ensure it matches. Double-check the documents you submitted in the previous step—do they match the other details? Are they clear and readable? Does your bank statement meet Amazon’s requirements?
Even if all the information is correct, there may still be an issue. I suggest resubmitting your details. If you’re rejected again, take new photos or rescan your ID and have someone else double-check everything. It can be hard to spot your own mistakes.
Step 11 - Utility Bill and Business License
Once the registration is complete, you’re done! Or are you? The answer is "maybe." Hopefully, you’re now approved and can start selling, but there’s a good chance your account will be suspended shortly after registration. If this happens, don’t panic! It happens to most sellers and is a step you should be prepared for. Amazon suspends accounts because they require additional information from you. Most commonly, they will ask for a Utility Bill and a Business License. What are these documents, and how do you get them? I wrote a blog post about registration documents about a year ago, but I’ll go through it again here.
Once you’ve obtained the documents, send them to Amazon along with a polite and clear email to maximize your chances.
What is a Utility Bill for Amazon?
A Utility Bill is simply an invoice for a utility, such as water, gas, broadband, electricity, or something similar. This bill is used to verify your company’s address, so all the details on the bill must match the information you provided to Amazon. The bill must be less than 90 days old and submitted in an approved format (e.g., PDF, PNG, JPG). It cannot be a screenshot but must be either originally received in a digital format or scanned.
The bill must also be in a language accepted by Amazon, such as English, German, Spanish, or French—but not Swedish. So, try to obtain the bill in English. If that’s not possible, you’ll need to have it translated. According to Amazon’s documentation, this translation must be done by a certified translator, such as Diction.se, which is quick and easy to work with.
What is a Business License for Amazon?
A Business License in this context translates to a "registreringsbevis" in Sweden. You can easily obtain this from the Swedish Companies Registration Office (Bolagsverket) website. Make sure to order the English version of the registration certificate. You don’t need to order the physical certificate; the electronic version sent via email is sufficient. You can find the English registration certificate here.
What If the Business License and Utility Bill Are Not Approved?
If you’ve submitted a Business License and a Utility Bill but still haven’t been approved, go over all the details again and ensure everything matches—company name, address, everything must be consistent. Then try submitting the documents again. Sometimes simply resubmitting the same documents works. If it still doesn’t work, try contacting Amazon support and upload a new Utility Bill. If you’re still having trouble, I recommend seeking help from an expert in this area, such as us at SellWave or one of the many knowledgeable Amazon experts at herowave.se.
Step 12 - Am I Finally Done?
Unfortunately, even after all this, you might not be completely finished. Depending on where you want to sell, Amazon may require even more documents, depending on local laws. The required documents may have changed since I wrote this (though I try to update this text as soon as I learn of any changes). As usual, it’s important that all documents are sent in English (or another approved language). Currently, the documents most commonly requested are:
- Complete Share Register: This document is primarily requested in Europe and is the company's share register.
- Articles of Association: This is the company's corporate charter, also requested primarily in Europe.
- Organizational Chart: This is a chart of the corporate structure. It is only relevant for companies that are part of a group with multiple companies (sister, subsidiary, or parent companies). It should be in English (or another approved language) and signed by the company’s CEO. If you have multiple companies in your group, Amazon may also request the above documents for those as well.
Summary - Registering on Amazon in 12 Steps
And that’s it! These are the 12 steps from start to finish for registering on Amazon. I hope this guide has been useful and that you can now get approved and start selling on Amazon. To summarize all the steps, here’s a quick recap below. Best of luck with your registration.
Summary of Steps:
- Choose which Amazon region you want to sell in.
- Start the Amazon registration process.
- Create a login on Amazon.
- Enter company name and country.
- Register company details.
- Enter contact person’s information.
- Enter debit/credit card details on Amazon.
- Enter brand and product code information.
- Submit bank statement and ID verification.
- Wait for Amazon’s decision.
- Provide Utility Bill and Business License if requested.
- Submit any additional documents (especially for the EU).
Good luck with your registration journey on Amazon! If you found this guide helpful, please share it with colleagues or friends who might also benefit from it. And remember, if you need any assistance, SellWave is here to help.


.avif)
